
How to convert a 16:9 video to 9:16
Simon Chawla · · 4 min read
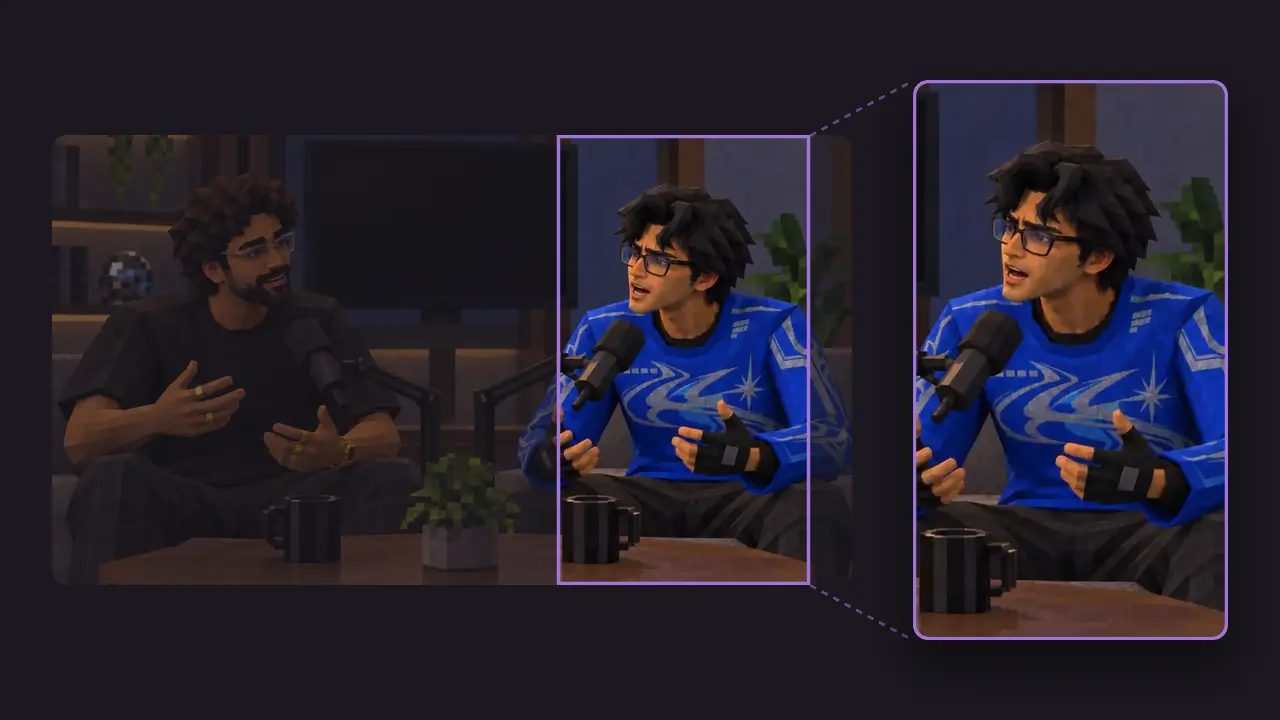
Most video is shot in widescreen 16:9, and TikTok, Instagram Reels and YouTube Shorts all want vertical 9:16. Converting one to the other isn't just a matter of changing a setting: a vertical frame holds only about a third of a widescreen shot, so you have to decide what stays in. This guide covers the three ways to do it, how to do each in the common editors, and how to get the export right.
Why a straight crop often goes wrong
A 9:16 frame cut from a 1920×1080 video is about 608 pixels wide, roughly 32% of the original width. If your subject stays still in the middle of the shot, that's fine. If they move, sit off-centre, or share the shot with someone else, a fixed centre crop will cut them off.
There's a quality cost too. That 608×1080 crop has to be scaled up to 1080×1920 for export, which softens the picture. A 4K source avoids this: its 9:16 crop is about 1215×2160, more than enough for a sharp 1080×1920 vertical video.
The three ways to go from 16:9 to 9:16
Crop and follow the subject. The vertical frame moves through the shot to stay on whoever is speaking or whatever is moving. This fills the screen and looks native to short-form platforms, and it's the best choice for most talking-head video, podcasts and interviews.
Stack two shots. Split the vertical frame into a top and a bottom half, each cropped from a different part of the widescreen shot. This works well for two people talking, or a speaker above their screen share or gameplay.
Fit the whole shot with a blurred background. Scale the full 16:9 video to the width of the vertical frame and fill the space above and below with a blurred, zoomed copy of itself. Nothing gets cut off, but the video only fills about a third of the screen. Use it for wide shots that don't survive a crop, like a landscape or a slide full of text.
How to convert 16:9 to 9:16 in your editor
CapCut
Open the project, select Ratio and choose 9:16. The video is centre cropped; drag and pinch it in the preview to reposition it, adding keyframes where the subject moves. CapCut also has an Auto reframe option that tracks the subject for you, though on some versions it needs a Pro plan.
Adobe Premiere Pro
Right-click your sequence in the Project panel and choose Auto Reframe Sequence. Pick Vertical 9:16, set the motion tracking to suit the footage (slower for interviews, faster for action), and Premiere builds a new vertical sequence with the framing keyframed. Check it through and nudge any shots it got wrong.
DaVinci Resolve
In the timeline's settings, untick Use Project Settings and set the resolution to 1080×1920. Then reposition each clip with Zoom and Position in the Inspector, keyframing where the subject moves. Resolve's Smart Reframe, which does the tracking automatically, is only in the paid Studio version.
FFmpeg
For a quick centre crop from the command line:
ffmpeg -i input.mp4 -vf "crop=ih*9/16:ih,scale=1080:1920" -c:a copy output.mp4
And for the full shot over a blurred background:
ffmpeg -i input.mp4 -filter_complex "[0:v]scale=1080:1920:force_original_aspect_ratio=increase,crop=1080:1920,boxblur=20[bg];[0:v]scale=1080:-2[fg];[bg][fg]overlay=(W-w)/2:(H-h)/2" -c:a copy output.mp4
FFmpeg can't follow a subject on its own, so it suits footage where the action stays in the middle.
Getting the export right
- Export at 1080×1920. That's the standard for all three platforms. Go higher only if your source has the detail for it.
- Mind the safe zones. Each app lays its buttons, username and caption over the video, mostly down the right side and along the bottom. Keep faces and on-screen text out of roughly the bottom fifth and the right-hand edge.
- Use a high bitrate. The platforms recompress everything you upload, so start from a clean file: around 10 to 20 Mbps for 1080p H.264 is plenty.
AI clip tools that reframe for you
If you're cutting long videos into short clips, AI clip tools do the reframing as part of the job. Each one tracks the subject through the shot rather than cropping the centre:
- OpusClip has AI Reframe, which tracks the important subjects in each shot and outputs 9:16, 1:1 or 16:9.
- Klap reframes YouTube videos to 9:16 with speaker tracking as it cuts them into clips.
- Vizard has an AI Reframe tool that tracks faces and speakers, with manual crop controls in its editor.
- Kondense reframes every clip it makes, and is covered in more detail below.
All of them have free tiers or trials, so it's worth running the same video through two or three and comparing the framing yourself.
Converting automatically with Kondense
Kondense is an AI clip generator built for long videos like podcasts, interviews and streams. Upload a video or paste its YouTube, Vimeo or Twitch link, and it picks the strongest moments, then:
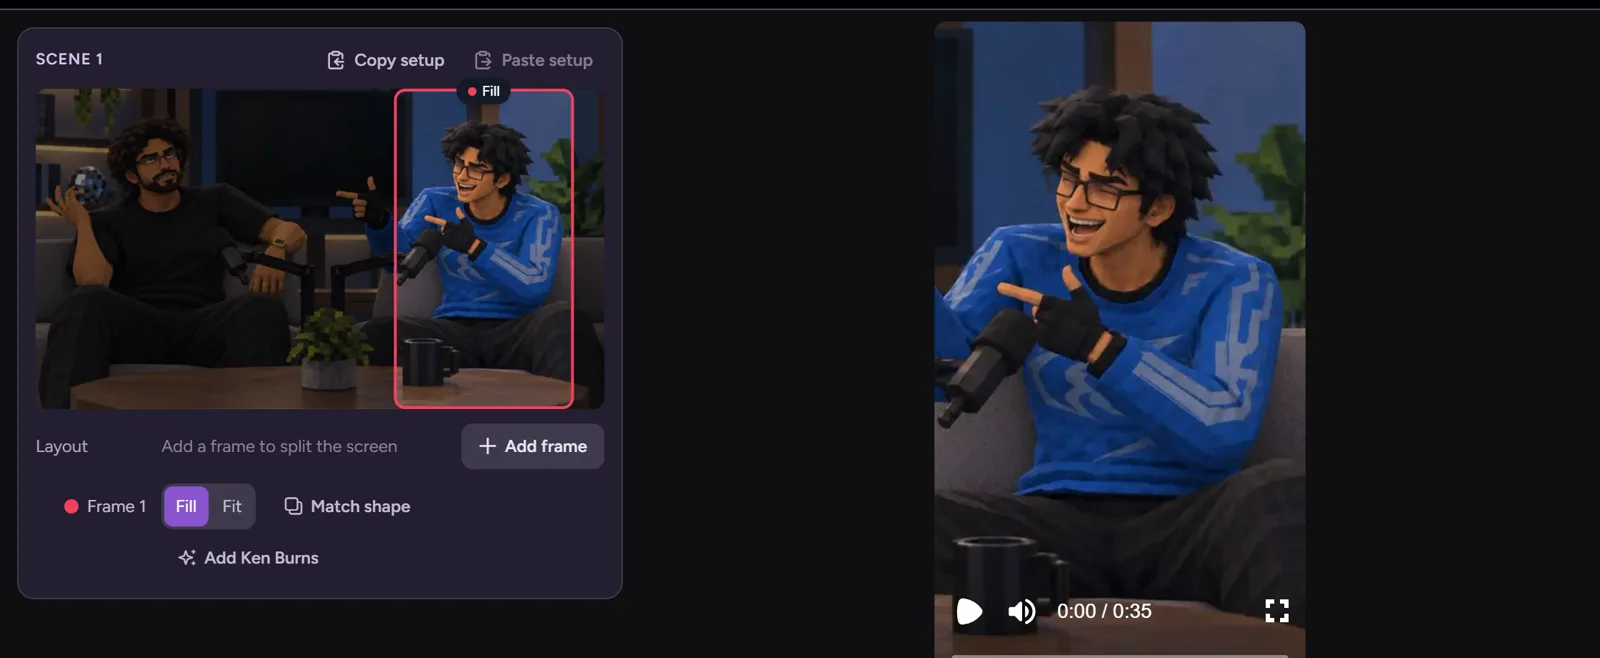
- Frames every clip. Auto framing finds the faces in each scene and keeps them centred, cut by cut, in vertical 9:16, square 1:1 or widescreen 16:9.
- Lets you adjust the frame. Move the vertical frame onto whoever you want, or add a second frame to stack two speakers.
- Captions every clip, so it's ready to post.
Kondense makes short clips rather than converting a whole video end to end, so for a full-length vertical version, one of the editors above is the better fit. For clips, there's a step-by-step walkthrough in how to turn a podcast episode into TikTok clips.
Your first video is free at any length up to 3 hours, with no card and no watermark. Try it on your own video.